2014 Mazda 6 Project
#41
 06-29-2013, 08:57 AM


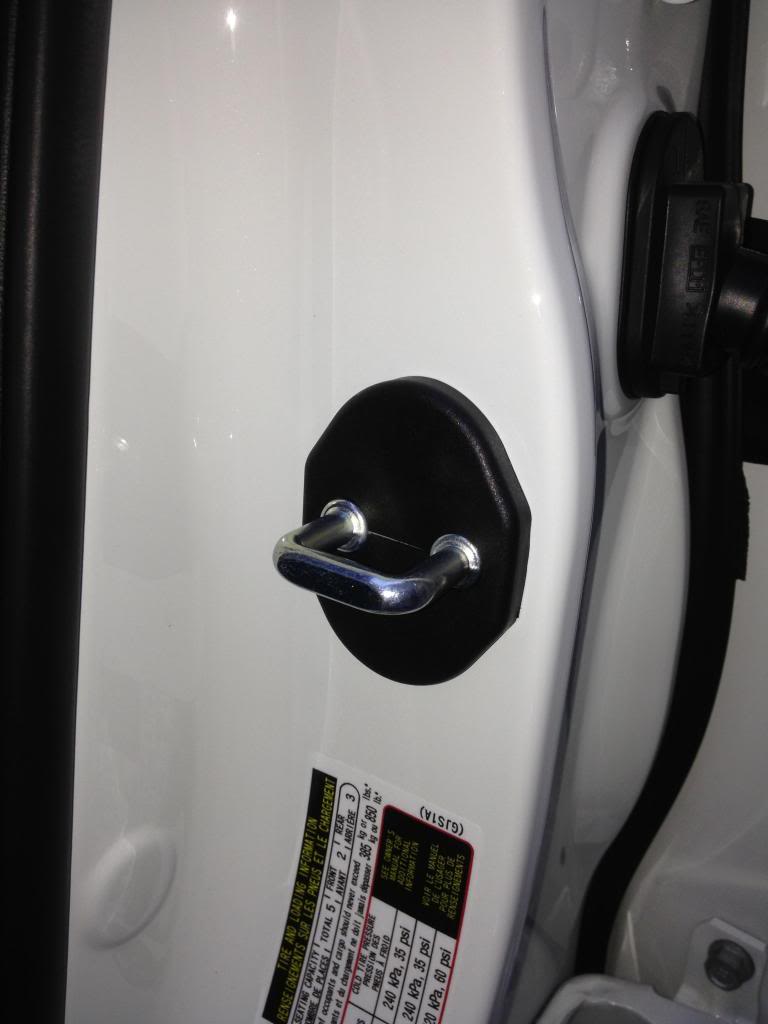
So, these are lock latch covers...small detail that nobody notices but it's a finishing look.
I have also covered the silver bolt holes where the stock air intake use to mount. It always bothered me that it's silver. Went to Pep Boys picked up some Chevy plastic body clips, now it's covered...OCD, can't help it...lol.
I have also covered the silver bolt holes where the stock air intake use to mount. It always bothered me that it's silver. Went to Pep Boys picked up some Chevy plastic body clips, now it's covered...OCD, can't help it...lol.
#42
07-09-2013, 03:43 AM

Hey man nice ride. Love what you did with it. I should be getting mine this week if the ship makes it on time. Still got that k&n you trying to get rid of? Also where did ya get the intake from? Does that mess with the Mazda warranty? Also the door lock covers is a nice touch where did ya find those not trying to steal your style just really digging it.

#46
07-20-2013, 08:58 PM

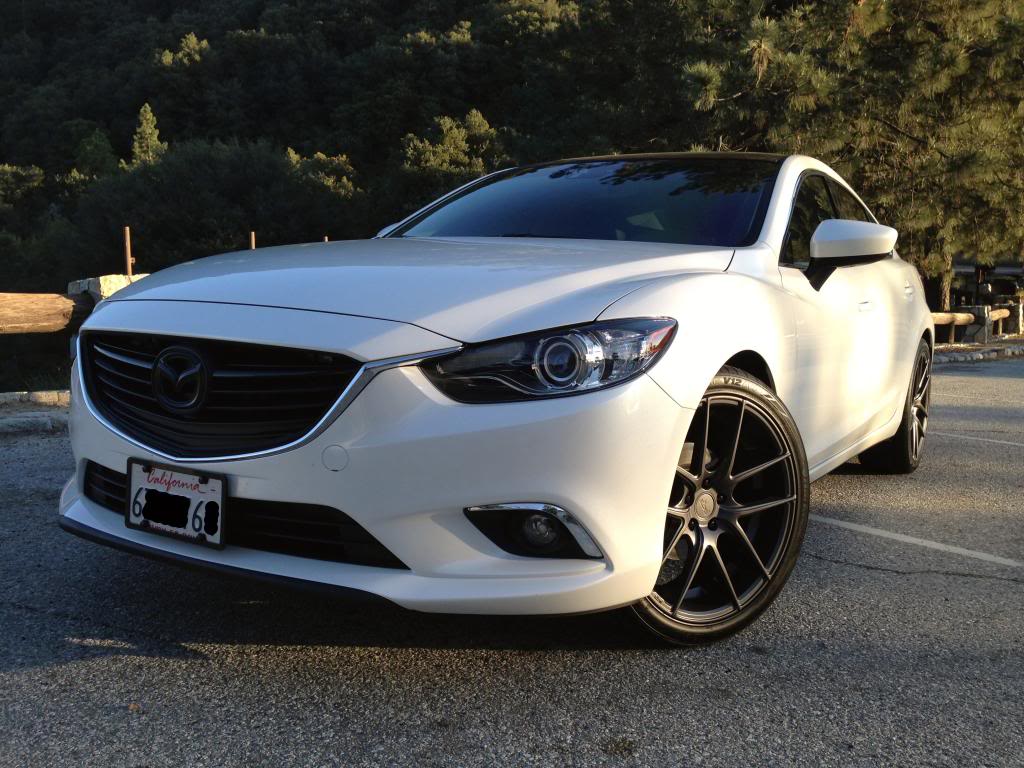
Just wanted to let you know that your car was the inspiration for me and my wife picking the 2014 Mazda 6 we just bought today in white! Planning on doing some of the things you've done to the car because you have very good taste.
Love the dark rims offsetting the white. I plan on maybe powder-coating the stock rims and getting bigger tires, still haven't decided. I also didn't want to lower the car and mess with the warranty. Keep the upgrades coming!
Edit: btw, where did you get your HID fog light kits. Would you mind listing where you bought your parts? Like the website name if possible.
Last edited by vnallapa; 07-20-2013 at 09:42 PM.
#47
07-21-2013, 03:07 AM
 Within 24 hours of owning it. I love my new 6. More things about to come just need some time off.
#48
07-21-2013, 11:02 AM
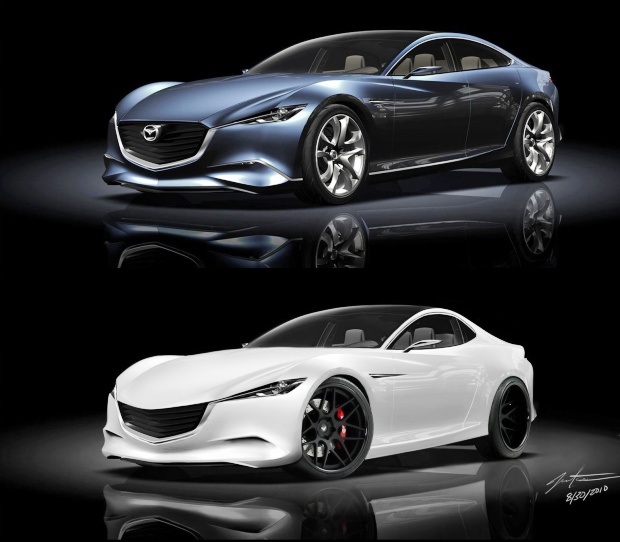
Funny that you should mention inspiration. I just posted this a few days ago at a different forum...
I found the picture that started it all for me. The concept drawing was my inspiration...I wish the production car had those lines and dimensions.
Vinyl roof wrap- Impressive Wraps, El Monte, CA.
Vinyl chrome trim- Bought chrome vinyl from Impressive Wraps and modified at home.
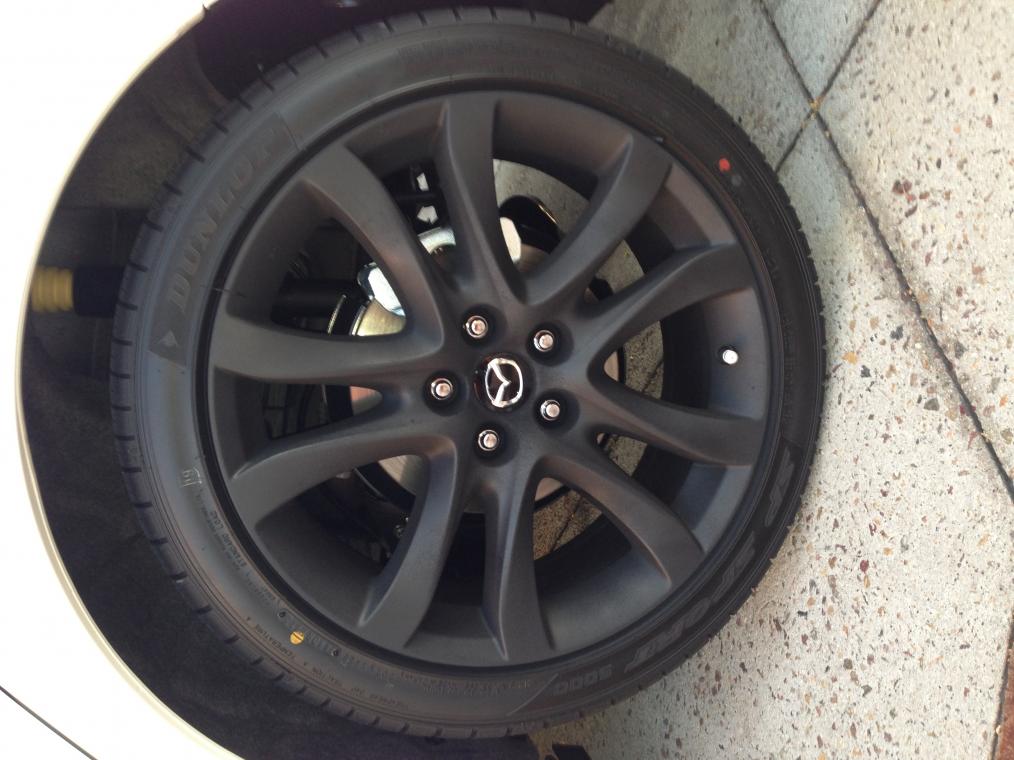
Wheels and Tires- Grand Prix Tires, Monterey Park, CA. Wheels: 20"X8.5" Niche M129 Targa Tires: Hankook V12 245/40/20
Fog lights- Morimoto H11 HID 5000K kit, The Retro Fit Source website
LED lighting- Front turn, rear turn, interior, door, license plate, Super Bright LEDs website
Custom LED trunk light- SWR Motorspost, Alahambra, CA.
Tint- SWR Motorspost, Alhambra, CA.
Aluminum pedals- eBay
Latch covers- eBay
Headrest blazer hanger- eBay
Center console tray- 2012 Mazda 3 tray, bought at dealer and modified at home.
White painted engine cover- Rustolium high temp spray paint in white, Home Depot and modified at home.
Cold Air Intake- Injen, Pomona, CA.
I found the picture that started it all for me. The concept drawing was my inspiration...I wish the production car had those lines and dimensions.
Vinyl roof wrap- Impressive Wraps, El Monte, CA.
Vinyl chrome trim- Bought chrome vinyl from Impressive Wraps and modified at home.
Wheels and Tires- Grand Prix Tires, Monterey Park, CA. Wheels: 20"X8.5" Niche M129 Targa Tires: Hankook V12 245/40/20
Fog lights- Morimoto H11 HID 5000K kit, The Retro Fit Source website
LED lighting- Front turn, rear turn, interior, door, license plate, Super Bright LEDs website
Custom LED trunk light- SWR Motorspost, Alahambra, CA.
Tint- SWR Motorspost, Alhambra, CA.
Aluminum pedals- eBay
Latch covers- eBay
Headrest blazer hanger- eBay
Center console tray- 2012 Mazda 3 tray, bought at dealer and modified at home.
White painted engine cover- Rustolium high temp spray paint in white, Home Depot and modified at home.
Cold Air Intake- Injen, Pomona, CA.
#49
07-21-2013, 12:12 PM
Those concepts do look great.
Thanks for the list of places you bought your parts. Was there enough space in the foglight area to mount up the ballasts, etc? Looking to replace my fog lights with HID as well.
Btw, what are the bulb #s for the front and rear turn signals? I can't seem to find that info anywhere seeing the car is so new.
#50
07-23-2013, 09:13 AM
To be honest with you, I don't remember. I belong to 3 other forums and have written about it. There is very little action here so most of my posts are in the 6 Crew forum or Mazda 6 Club forum. The front are double filament and the rear are single filament. 7444 are double and 7440 are single. Double check...it's been so long ago.
Fog light HID install tips.
1. Remove all screws and clips along the front to the wheel well on the under cover. Remove all screws and clips in the front of the wheel well. This will give you full access to the fog light area and bumper bracket.
2. The HID H11 bulbs are longer, so install may take more care. I've noticed that the rubber gasket on the HID bulb is moved for packaging purposes. Move this back to the base of the bulb(most common question I've been asked is this problem).
3. Mount your ballast on the outer part of the bumper brace. I have my connections pointing downward and I used double sided tape and zip ties to hold them in place. The ballasts will sit perfectly on a little shelf on the bumper brace bracket.
Hope that helped.
Last edited by Monkee; 07-24-2013 at 10:33 AM.