
fog lights in op


Thread Starter
|
Member
Joined: Jun 2006
Posts: 42
Likes: 0
From: Monmouth County, NJ
i installed factory fit fog lights to oem harness and switch but fog lights wont turn on. i had an aftermarket harness on them was able to jump the realy and power them up. i have power at both the fog light fuse and relay. i do not know where to begin or why they are not turning on. any help is welcomed.
thanks
thanks

Junior Member
Joined: May 2010
Posts: 21
Likes: 0
You will have to find out what supplies the ground to the relay if it is the fog light switch make sure you have your ground to the switch that is if you have your 2 powers feeding the relay. you will need a wiring diag. to find out what the switch feeds power or ground and where the ground is feed from.

Junior Member
Joined: May 2010
Posts: 4
Likes: 0
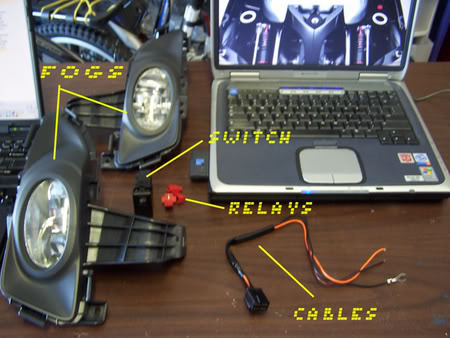
So here we go with what the aftermarket Fog Light kit came with: (laptops not included):
First of all, remember that the electrical system of a car is very delicate. You assume a great risk by doing this, same way I did. I am not a professional technician, I’m an architect! I hope it works for you as well as it worked for me. So if you are willing to see if it works, go ahead… This will work as long as you have the same kit that I got. You will notice that the installation is half different from the original kit.
Please unplug the negative pole of your car’s battery before you do anything! You will need a screwdriver for the second step.
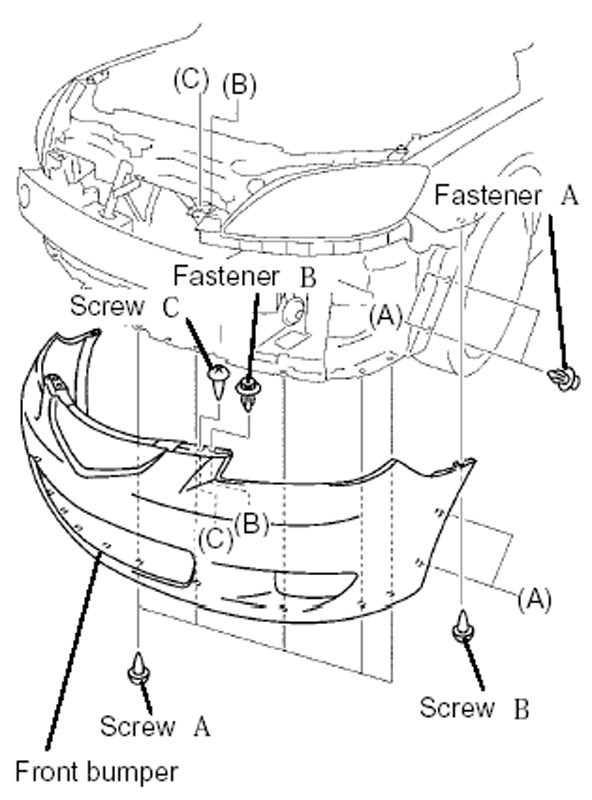
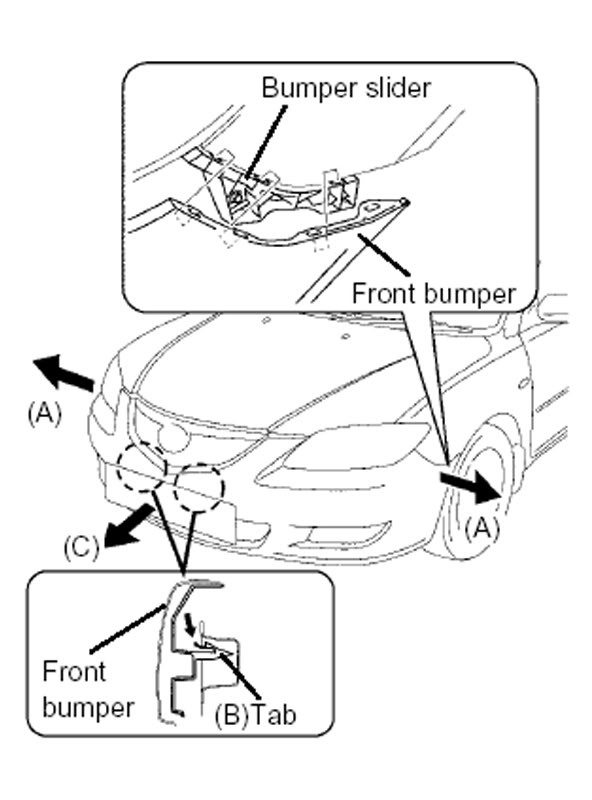
I scanned these following pics from the instructions that a friend from the dealership provided me. These pictures belong to the original fog light kit booklet. As you can see, both diagrams explain how many bolts are there and how to unsnap the front spoiler. Be sure to have a small plastic recipient to store the screws meanwhile.
Be gentle, specially with the two tops corners (A).
Be sure to put a big piece of cloth or old towel so that you won’t scratch your bellowed and shiny spoiler. (We have enough with mosquitoes in FL…)
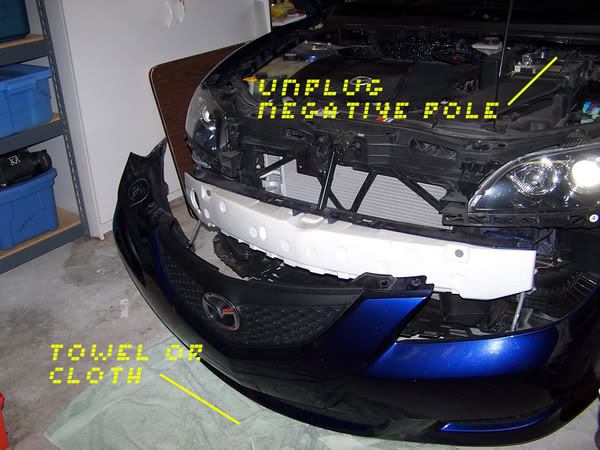
As you can see, the hole cover already has the male plug that will connect with the female fog light is already there. Unplug both sides so that the spoiler can be laid down.
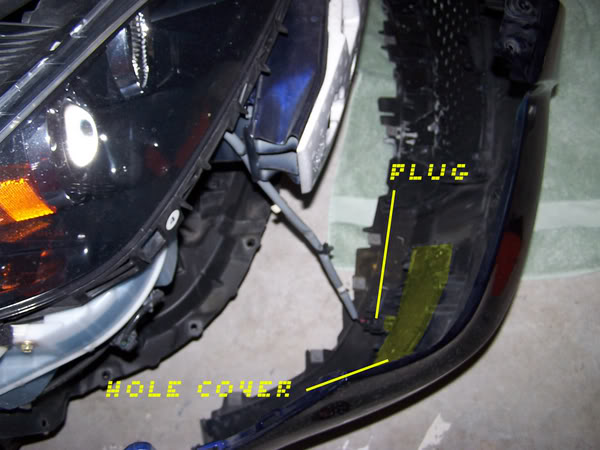
You will end up with this on both sides. Remove both hole covers with help of a flat screwdriver. Put the lights in place and connect them. After that you can just put it back together and close it.
Now go to the console. I ran out of relays (since the kit only came with 2, but I recommend that you get an extra one, so that you don’t have to peel the cables to connect it to the other and insulate it with tape. Relays are easier to work with.
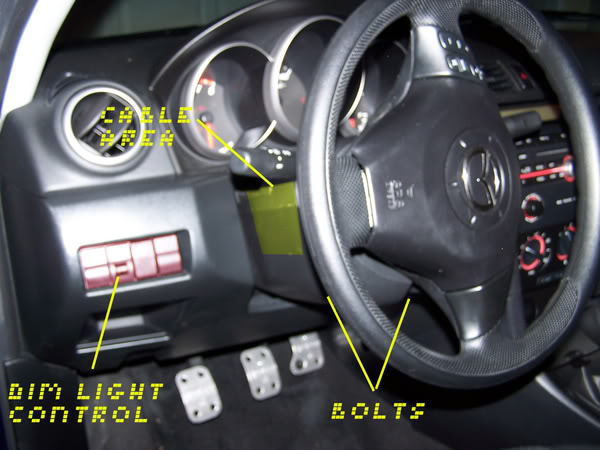
Remove the two bolts that sit below the column; so that you can make it lose (you don’t need to open it completely). With the help of a flat screwdriver remove one of the plastic hole fillers next to the dim control switch. Remove that switch as well, by pushing it with your fingers from inside (it will hurt!).
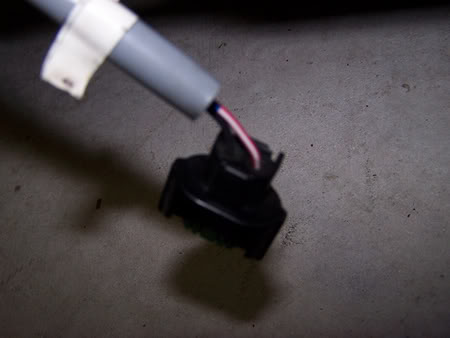
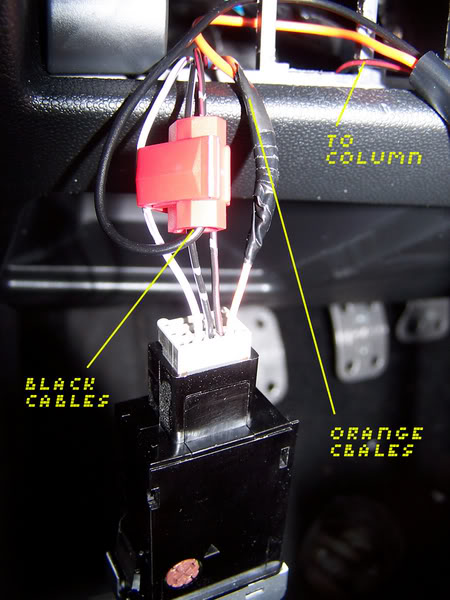
The cables that belong to the aftermarket fog light switch are 3(dark red n black, orange and black). Take the dark red cable to the column, with the help of an old metal hanger. Keep the orange and the black one there.
Thanks to M3-GT, I was able to find out which one was the cable that controlled the fog lights. Use one of the relays to connect the “dark red n black” cable from the after market switch to the one shown in M3-GT ‘s tutorial:
http://www.xenonexpert.com/guides/fog04.jpg (Hope you don’t mind me linking your picture man, mine was too unfocused)
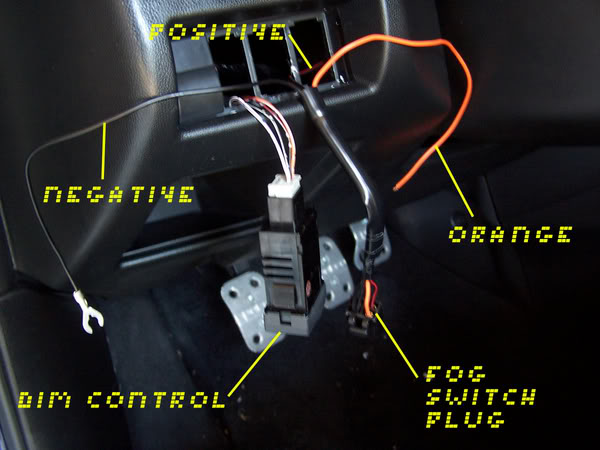
That means “dark red n black” goes with “dark red n black”…
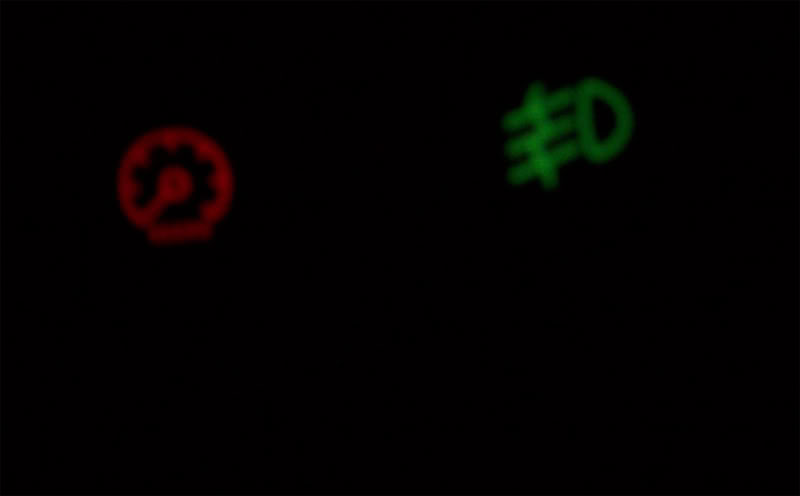
Orange w/ orange … and black w/black! Easy! The orange cable light up the button, if you don’t like it, you might just skip connecting them.
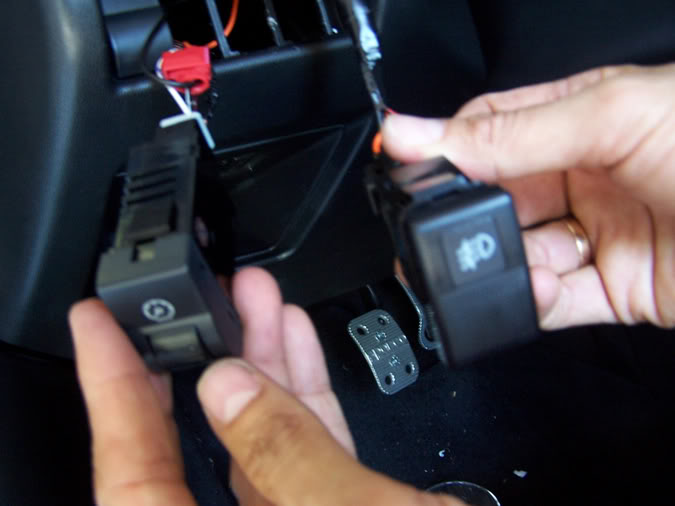
So now you have both ready to put them in place!
I wish it came in red… but I still like it…it sure is a “perfect fit”
Nice clean look!
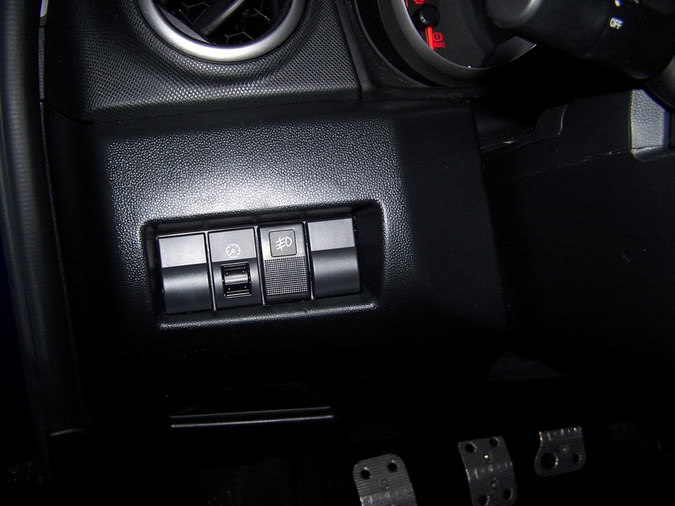
Final product…
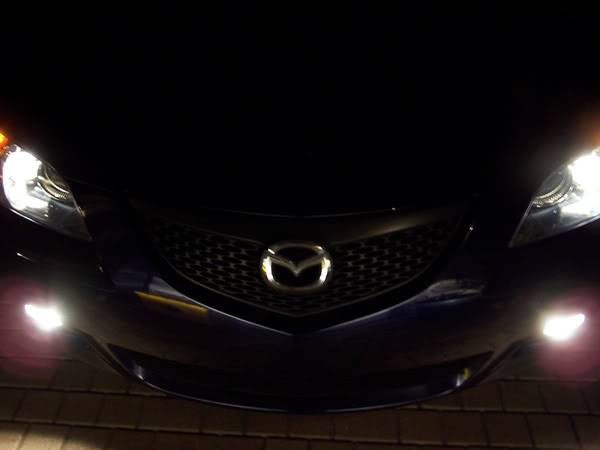
I hope this tutorial helps you to sort out your problem.
First of all, remember that the electrical system of a car is very delicate. You assume a great risk by doing this, same way I did. I am not a professional technician, I’m an architect! I hope it works for you as well as it worked for me. So if you are willing to see if it works, go ahead… This will work as long as you have the same kit that I got. You will notice that the installation is half different from the original kit.
Please unplug the negative pole of your car’s battery before you do anything! You will need a screwdriver for the second step.
I scanned these following pics from the instructions that a friend from the dealership provided me. These pictures belong to the original fog light kit booklet. As you can see, both diagrams explain how many bolts are there and how to unsnap the front spoiler. Be sure to have a small plastic recipient to store the screws meanwhile.
Be gentle, specially with the two tops corners (A).
Be sure to put a big piece of cloth or old towel so that you won’t scratch your bellowed and shiny spoiler. (We have enough with mosquitoes in FL…)
As you can see, the hole cover already has the male plug that will connect with the female fog light is already there. Unplug both sides so that the spoiler can be laid down.
You will end up with this on both sides. Remove both hole covers with help of a flat screwdriver. Put the lights in place and connect them. After that you can just put it back together and close it.
Now go to the console. I ran out of relays (since the kit only came with 2, but I recommend that you get an extra one, so that you don’t have to peel the cables to connect it to the other and insulate it with tape. Relays are easier to work with.
Remove the two bolts that sit below the column; so that you can make it lose (you don’t need to open it completely). With the help of a flat screwdriver remove one of the plastic hole fillers next to the dim control switch. Remove that switch as well, by pushing it with your fingers from inside (it will hurt!).
The cables that belong to the aftermarket fog light switch are 3(dark red n black, orange and black). Take the dark red cable to the column, with the help of an old metal hanger. Keep the orange and the black one there.
Thanks to M3-GT, I was able to find out which one was the cable that controlled the fog lights. Use one of the relays to connect the “dark red n black” cable from the after market switch to the one shown in M3-GT ‘s tutorial:
http://www.xenonexpert.com/guides/fog04.jpg (Hope you don’t mind me linking your picture man, mine was too unfocused)
That means “dark red n black” goes with “dark red n black”…
Orange w/ orange … and black w/black! Easy! The orange cable light up the button, if you don’t like it, you might just skip connecting them.
So now you have both ready to put them in place!
I wish it came in red… but I still like it…it sure is a “perfect fit”
Nice clean look!
Final product…
I hope this tutorial helps you to sort out your problem.

Thread
Thread Starter
Forum
Replies
Last Post