Mazda3 Offered in both a sedan and wagon, this sporty model offers a great car for the family, as well a fun track car.

Side View Mirror Removal and Gut

Thread Tools
 
Search this Thread
 
Old Sep 3, 2010 | 07:31 AM
  #1  
apbbnbanb_07's Avatar
Thread Starter
|
Senior Member
Joined: May 2008
Posts: 591
Likes: 0
From: Farmer City, IL
Default Side View Mirror Removal and Gut

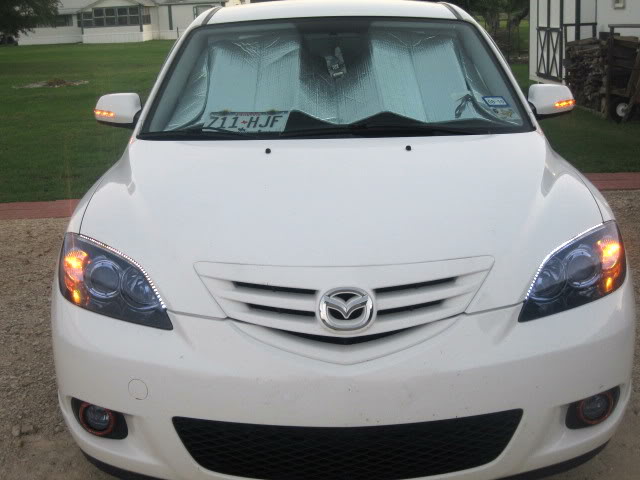
Couldnt find it on the search. Can anybody tell me how to remove and gut the side view mirror assembly?
I'm sure I could figure it out but before I get in there and start breaking things I figured I would ask.

Also, how much room is there behind the power mirror setup?
 
Reply
Old Sep 3, 2010 | 06:38 PM
  #2  
icspots's Avatar
Super Moderator
Joined: May 2006
Posts: 1,526
Likes: 0
From:
Default

I think THIS should take care of you.

There isn't much room behind the mirror. What did you have in mind?
 
Reply
Old Sep 4, 2010 | 07:59 AM
  #3  
apbbnbanb_07's Avatar
Thread Starter
|
Senior Member
Joined: May 2008
Posts: 591
Likes: 0
From: Farmer City, IL
Default

Sweet, Thank you.

I was actually gonna try to use some single bulb amber LEDs to create an aditional side turn signal off the back of the mirror.
 
Reply
Old Sep 4, 2010 | 10:19 AM
  #4  
icspots's Avatar
Super Moderator
Joined: May 2006
Posts: 1,526
Likes: 0
From:
Default

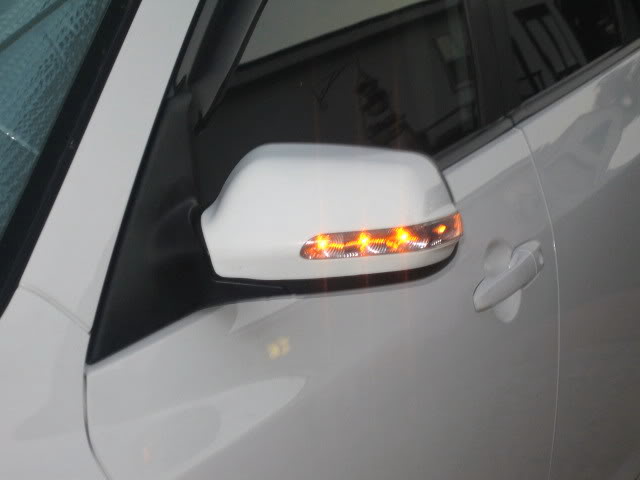
There's plenty of space in there for some LEDs. Once you have the glass out you should be able to see the little plastic clips that hold the painted cover on. Be really careful with those as they're a very hard plastic so they can break when you bend them out of the way. Slow and steady is the key. If you have a heat gun you could try heating them up for a minute as well.
 
Reply
Old Sep 4, 2010 | 12:45 PM
  #5  
apbbnbanb_07's Avatar
Thread Starter
|
Senior Member
Joined: May 2008
Posts: 591
Likes: 0
From: Farmer City, IL
Default

Thanks for the tips and the links.
 
Reply
Old Sep 4, 2010 | 02:44 PM
  #6  
icspots's Avatar
Super Moderator
Joined: May 2006
Posts: 1,526
Likes: 0
From:
Default


Look forward to seeing your results. The real PITA is going to be running your wires through with the OEM bundle through the boot. Especially on the driver's side as there are more wires in that bundle.
 
Reply
Old Sep 4, 2010 | 04:51 PM
  #7  
virgin1's Avatar
Super Moderator
Joined: Mar 2007
Posts: 8,666
Likes: 0
From: Manor, TX (Outside of Austin)
Default


There he is again... our mirror and stereo guy.
Nice to see you checking in again, Remi (BTW: Sorry 'bout the misspell yesterday.)

To Alex: Is THIS what you had in mind??

Name:  IMG_2012.jpg
Views: 250
Size:  47.0 KB

Name:  IMG_2011.jpg
Views: 228
Size:  25.3 KB
 
Reply
Old Sep 4, 2010 | 08:24 PM
  #8  
apbbnbanb_07's Avatar
Thread Starter
|
Senior Member
Joined: May 2008
Posts: 591
Likes: 0
From: Farmer City, IL
Default

Somewhere close to that, wasn't quite sure what mine would look like when it was finished. What excatly did you do, or did you buy the whole assembly?
 
Reply
Old Sep 4, 2010 | 09:09 PM
  #9  
virgin1's Avatar
Super Moderator
Joined: Mar 2007
Posts: 8,666
Likes: 0
From: Manor, TX (Outside of Austin)
Default


I bought the covers, disassembled the mirrors, removed the OE outer housing and replaced them with these new covers.

Now wiring them they way I want will be another matter for another day.....

 
Reply
Old Sep 5, 2010 | 09:07 AM
  #10  
apbbnbanb_07's Avatar
Thread Starter
|
Senior Member
Joined: May 2008
Posts: 591
Likes: 0
From: Farmer City, IL
Default

Nice, where did you purchase these?
And what other way would you want them wired?
 
Reply


All times are GMT -5. The time now is 11:02 PM.