
Demon Eyes


Thread Starter
|
Junior Member
Joined: Jan 2009
Posts: 14
Likes: 0
From: Dallas
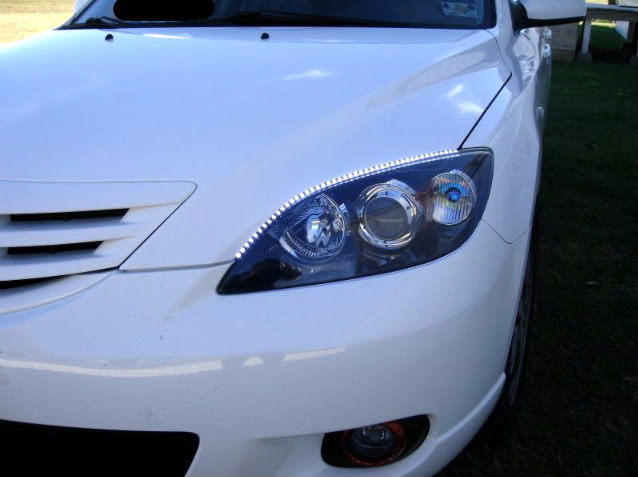
So I decided I really liked the look of the Demon Eyes so I ordered the DDM DDE Lightening Raptor series! I read a few threads about the install and sort of got disheartened about the install. After reading the threads on other forums it seemed like a really difficult project to undertake. Well I finally got the cojones to install them this past weekend. I must say, the install was not nearly as difficult as I was lead to believe. It took me a few hours to complete and it was a slight pain in the butt, however, the outcome was well worth the trouble. If you are worried about the baking process for the headlights 200 degrees for 10 minutes will do the trick. If you think about it 200 isn't all that hot. It is just warm enough to soften the glue holding the lens in place. If you decide to do this mod, just make sure to take your time and don't rush through it. Some of the pieces can be fragile but if you give it a little finesse you'll be ok. I'll post pics as soon as I get my photo bucket account set up.

Super Moderator
Joined: Mar 2007
Posts: 8,666
Likes: 0
From: Manor, TX (Outside of Austin)
Congrats, lawdog... and waiting for pics!
Frankly, I had the same reservations as you did. I went another route that was seemingly easier and longer lasting.
These are LED "eye lids." I connected mine so that they are always on when the ignition is. And, because of where I power then from, they stay on for a period of time after the key is turned off. (Timed off.)
Except for having to create a wiring harness and deciding how and where to run it, it wasn't that bad.
I hope for your future sake that you used clear silicone to install the bulbs instead of the double stick tape that comes with the kit. I know from others that it will eventually (+/-2yrs.) turn brown, where as the silicone won't.
Last edited by virgin1; Oct 27, 2009 at 08:14 PM.

Super Moderator
Joined: May 2006
Posts: 1,526
Likes: 0
From:
Yeah, the DDE's really aren't all that difficult to install, just a little time consuming. I think most people who have had problems with them are those who get impatient and rush through things.
I installed mine a few months ago (or so) as well. Sadly I had a few issues. First the epoxy I had set to quickly, then the right low beam halo wouldn't stick to the ring (took about 40 minutes to get it solid), then the next day the left low beam halo started flickering and ultimately crapped out. I removed that one and got it replaced under warranty, but I still haven't had a chance to replace it yet. I disconnected the right low beam one so at least the high beam ones are symmetrical, but I can't wait to have all of them working again.
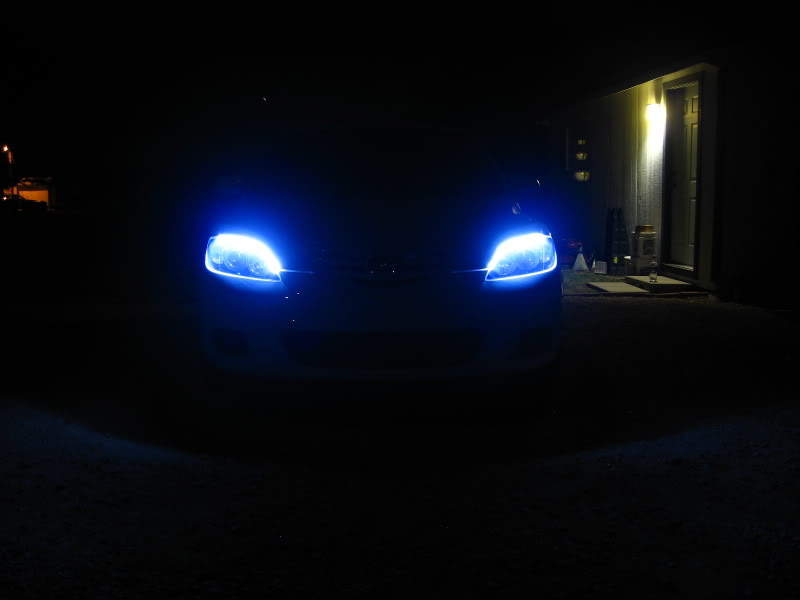
Here's the one pic I was able to get of all of them working before that one died it's untimely death.
DDEs.jpg?t=1248645308
and just the high beam ones.
DDEHionlydark.jpg?t=1256698544
DDEHionlyflash.jpg?t=1256698588
I installed mine a few months ago (or so) as well. Sadly I had a few issues. First the epoxy I had set to quickly, then the right low beam halo wouldn't stick to the ring (took about 40 minutes to get it solid), then the next day the left low beam halo started flickering and ultimately crapped out. I removed that one and got it replaced under warranty, but I still haven't had a chance to replace it yet. I disconnected the right low beam one so at least the high beam ones are symmetrical, but I can't wait to have all of them working again.
Here's the one pic I was able to get of all of them working before that one died it's untimely death.
DDEs.jpg?t=1248645308
and just the high beam ones.
DDEHionlydark.jpg?t=1256698544
DDEHionlyflash.jpg?t=1256698588
Last edited by icspots; Oct 27, 2009 at 09:56 PM.
Thread Starter
|
Junior Member
Joined: Jan 2009
Posts: 14
Likes: 0
From: Dallas
Yeah I made sure to use the silicone. I didn't really trust that double sided tape with the heat! That really kind of sucks that your low beam crapped out. I don't think I would want to repeat the project anytime soon. Hopefully, knock on wood, mine stay fully functional!
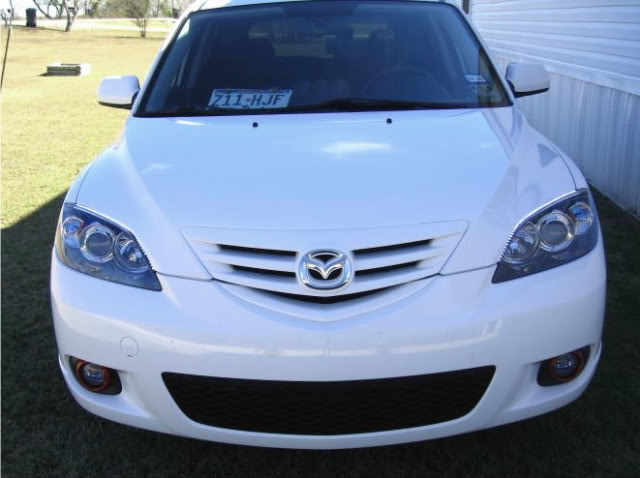
Here are a couple of pics:
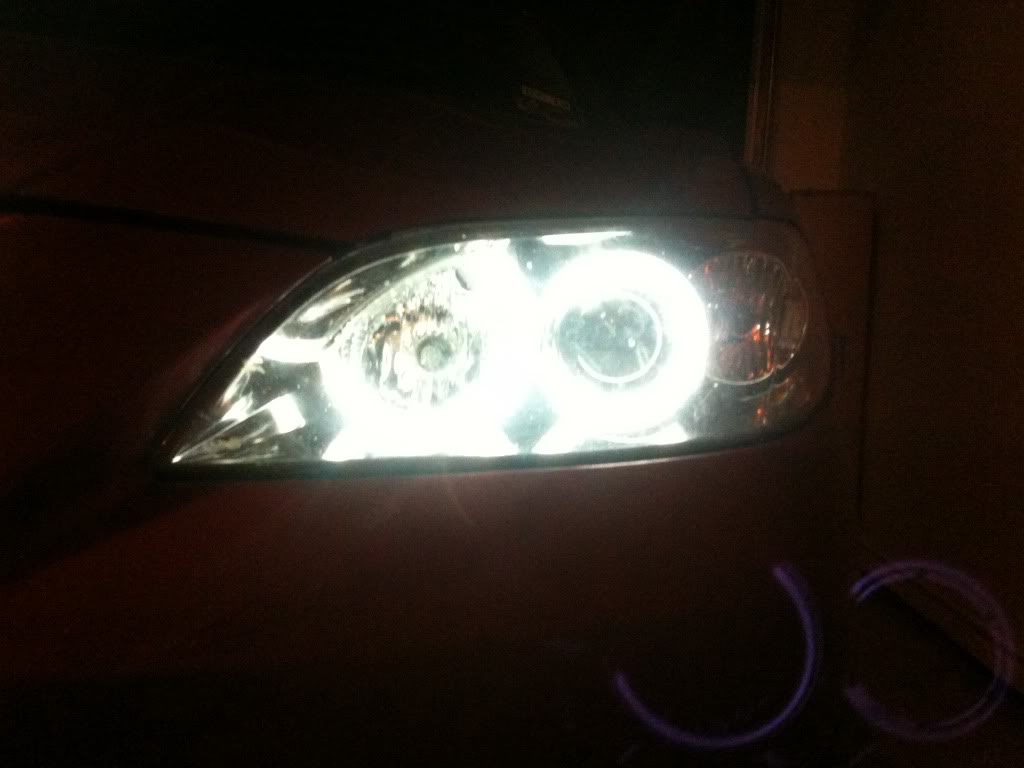
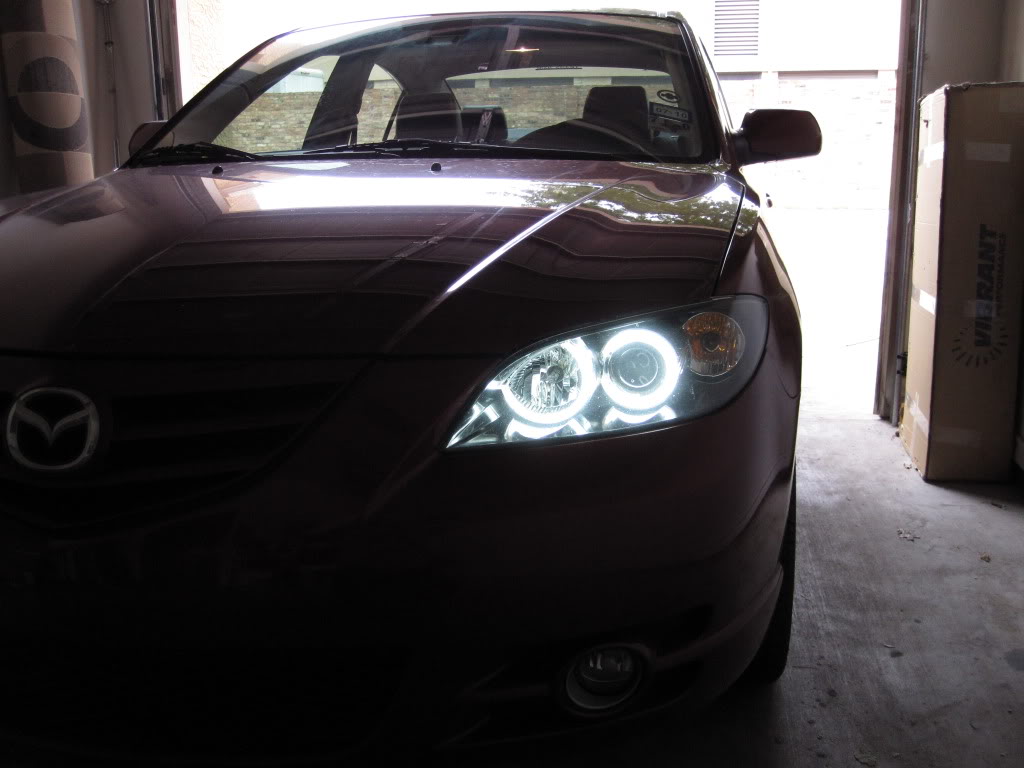
Here are a couple of pics:
Super Moderator
Joined: Mar 2007
Posts: 8,666
Likes: 0
From: Manor, TX (Outside of Austin)
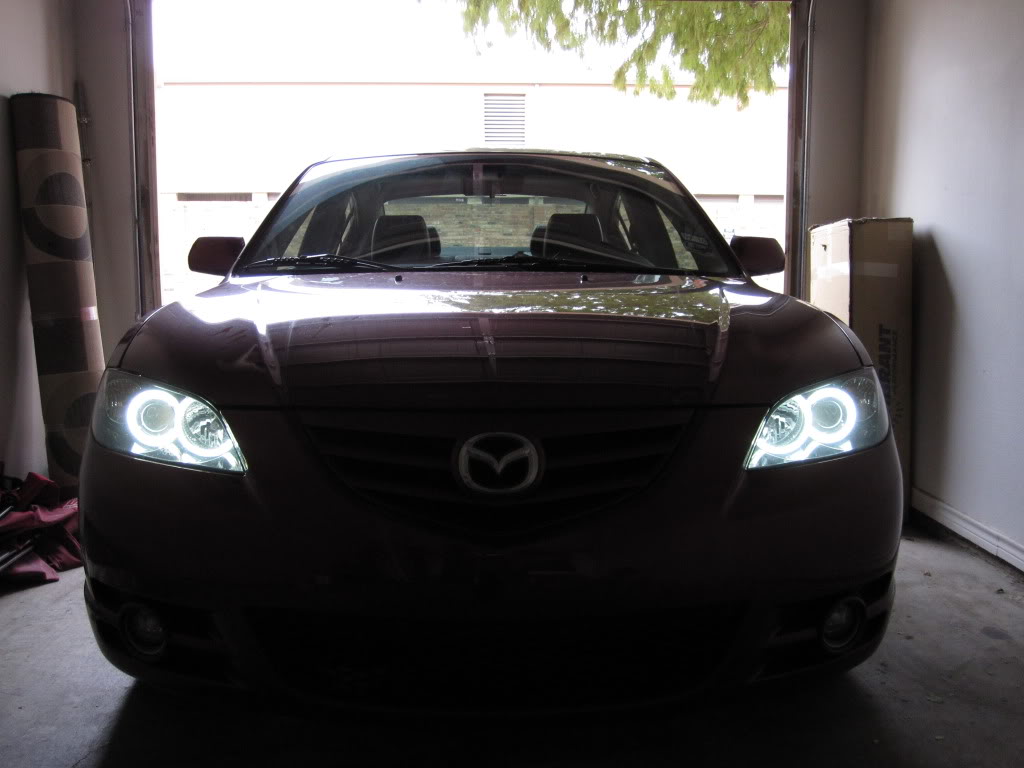
Looks Good, LD!!! Congrats on a good install.
PMM I see? I like the Vibrant box in the bg too.

Remi, Y'know, I almost like it better w/o the low beams. To me it looks more sinister that way.
Perhaps when you replace the low beams you should put them on a switch so they can be turned off separately?
Last edited by virgin1; Oct 28, 2009 at 03:56 PM.
Super Moderator
Joined: May 2006
Posts: 1,526
Likes: 0
From:
Looks Good, LD!!! Congrats on a good install.
PMM I see? I like the Vibrant box in the bg too.
Remi, Y'know, I almost like it better w/o the low beams. To me it looks more sinister that way.
Perhaps when you replace the low beams you should put them on a switch so they can be turned off separately?
Thread Starter
|
Junior Member
Joined: Jan 2009
Posts: 14
Likes: 0
From: Dallas
That is actually a really neat idea! I used zip ties to hold the ballasts in place so they would be really easy to move and center mount... Probably wouldn't be too terrible of a task to wire up a switch either. Good call Virgin! I may try that sometime in the near future. Gotta get my suspension done first. I may try and wire up some ambient blue lighting at the pedals too...

Senior Member
Joined: May 2008
Posts: 591
Likes: 0
From: Farmer City, IL
What type of fuse system did you guys use for your lighting. And where did you run power from.
I have other lighting ran straight to the battery, with a fuse jerry rig'd in the circuit, is this not a good idea?
I was kinda leery about doing this, but was curious on what others have done.
I have other lighting ran straight to the battery, with a fuse jerry rig'd in the circuit, is this not a good idea?
I was kinda leery about doing this, but was curious on what others have done.
Thread Starter
|
Junior Member
Joined: Jan 2009
Posts: 14
Likes: 0
From: Dallas
I actually ordered mine as a kit from the rpmstore but its a pretty basic setup if you have a relay and ballasts. The main power line runs from the positive post on the battery to the relay. There is a 10 amp fuse is on that line between the battery and the relay. The relay then runs a ground wire (which obviously will be grounded), a power wire (which plugs into the empty accessory slot in the fuse box completing the circuit), and wires to both ballasts. The ballasts then run wires to the lights. Its pretty basic.

