
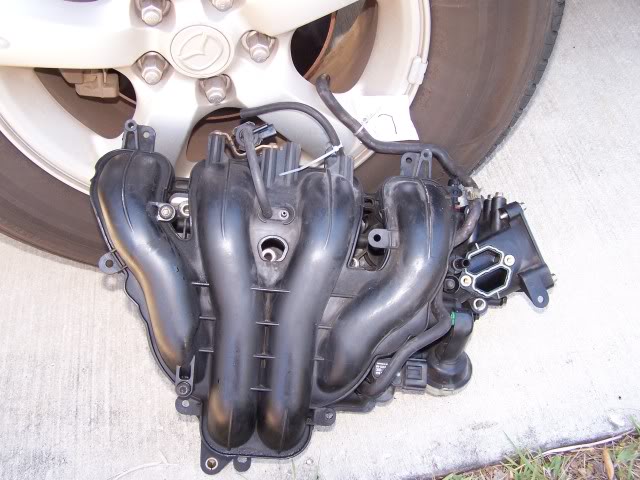
Intake manifold removal for 2.3L


Thread Starter
|
Junior Member
Joined: Mar 2008
Posts: 7
Likes: 0
My vehicle is a 2005 Mazda Tribute 2.3L but this should be about the same for all 2.3L cars.
First off let me say that this is the way that I decided to go about doing it since All-data is about useless and the Hayne's manual is just plain wrong (heck there is a step in Hayne's about pulling the alternator?!?). So I will post the steps I took to get the thing out. I started taking good notes, but by the end my notes got crappy... Of course the usual stuff applies: use at your own risk, I'm not responsible, weight loss not typical, and your mileage may vary...etc. BTW i call those plastic retainer thingees "Poppits" some others call them christmas tree connector..etc
Level of difficulty : Not easy, but take your time you can do it!
1. Remove both lower sight sheilds.
2. Remove hood latch.
3. Remove air temp sensor beneath hood latch.
4. Remove upper and lower bolts that retain the metal brace that the hood latch was on.
5. Remove the radiator bracket bolts (8mm) and the 10 mm bolt that holds the front grill trim. Also undo "poppit". Remove radiator brackets.
6. Remove bolts securing both fans 6 total i think.
7. Wiggle jiggle and curse the fans out after you pop the electrical connection loose. It helps that the radiator can be pulled back toward you a little at this point. Oh you have to pull that metal support frame out at some point too. It was easier for me to pull the right fan (facing the car) out first, then slide the left fan a little to the right to avoid the upper radiator hose.
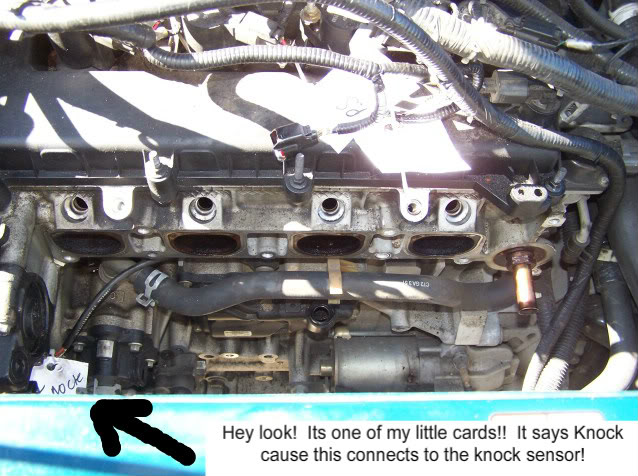
8. Ok now we have some room to breathe. Now start disconnecting all the electrical and vacuum connections (MAKE SURE TO LABEL THEM!! I use cards and zip ties for my work)
9. Remove upper and lower TORX screws that retain the dipstick tube. Go under the car and gently pop the tube out. Make sure you dont scratch the oring..thats all that seals it.
10. Remove left half of air box, breather tube, the black plastic tube etc. Also accelerator cable from throttle body. The throttle body doesnt absolutely have to come off, but it makes life easier.
11. Under the car unhook the oil pressure sending unit and then follow the line up and disconnect whatever that is too (its big)
12. back up top disconnect the knock sensor and the power steering pump.
13 once you have all that stuff unhooked you should be able to get that main wiring harness up and out of the way. Also now is a good time to remove the tube ( Fuel vapor return) that connects right next to the IAC. All you do is push straight in on the white band with your thumbnail and at the same time pull towards you. Of course as simple as that is it took me 20 minutes to figure it out without breaking it....why would ford use all the same plastic fastening technology...that would be boring.
14. Remove the 8 bolts from the intake. The one in the middle is TOTALLY a blind shot and the one that is all the way to the left is partially obscured by the power steering pump.
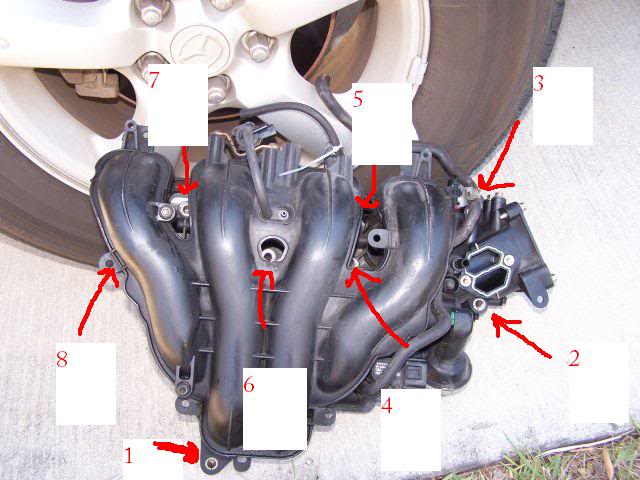
Number 8's arrow doesnt exactly point to where the bolt is, but look for it right next to the power steering pump..and Oh buddy that one in the middle is fuuunnn i tell you what.
15. The bolts are NOT all the same size..so make sure you mark what goes where. If you are going to take the intake all the way out, you will have to pull the fuel rail..No big whoop. 2 10mm bolts and 4 electrical connections. Leave the fuel supply line attached. Watch out, there are little spacers behind those bolts..and you need em! Once hardware is free, just wiggle jiggle up on the fuel rail and put it somewhere that doesnt stress the supply line. When putting it back together, put some vaseline or silicone goo on the orings. Gotta lube em up to get them to slide in...once again, these orings are the only seal on this component....
16. You have to get the PCV tube unhooked somehow..its not easy. Since mine looked like this
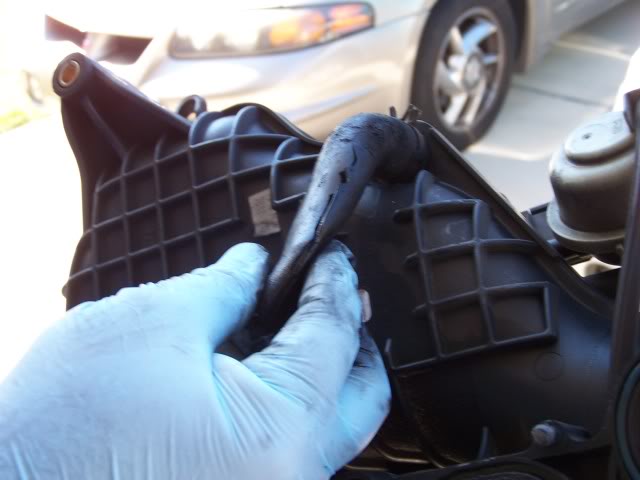
I just reached in there with a razor knife and cut it..problem solved. You will then see this...
Clean those with a brass brush so you dont mar the metal.
17. Installation is reverse of removal with a few things...May i suggest you use "the old sticky socket"
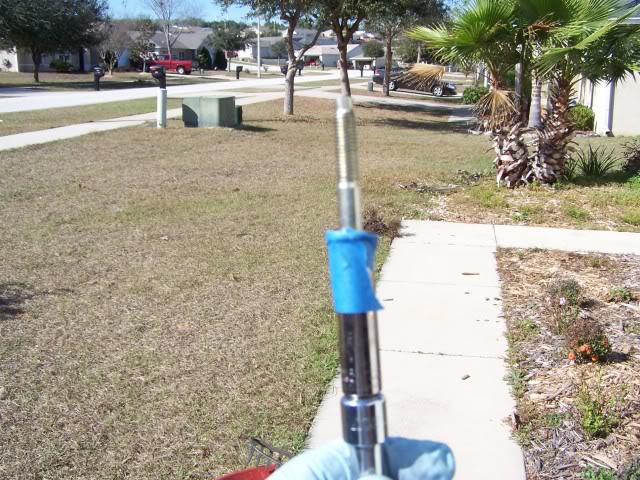
Unless you know how to swear in several languages. Also in this repair a little telescoping magnet will save your butt!
The tape is strong enough to hold the bolt but snaps off when you get it tight..down side is if you use too much tape, the tape stays on the bolt and not on the socket..its takes some experimentation but you get the idea.
The book says this is a 2.6 hour job. It took me 7 hours over two days, but i work slow and easy.
Hope this helps someone...but once again I am SURE that i left some steps out. Take your time! Dont force anything. If if doesnt come loose right away, double check everything. There is A LOT of little electrical and vac lines criss crossing this stupid piece of plastic!
First off let me say that this is the way that I decided to go about doing it since All-data is about useless and the Hayne's manual is just plain wrong (heck there is a step in Hayne's about pulling the alternator?!?). So I will post the steps I took to get the thing out. I started taking good notes, but by the end my notes got crappy... Of course the usual stuff applies: use at your own risk, I'm not responsible, weight loss not typical, and your mileage may vary...etc. BTW i call those plastic retainer thingees "Poppits" some others call them christmas tree connector..etc
Level of difficulty : Not easy, but take your time you can do it!
1. Remove both lower sight sheilds.
2. Remove hood latch.
3. Remove air temp sensor beneath hood latch.
4. Remove upper and lower bolts that retain the metal brace that the hood latch was on.
5. Remove the radiator bracket bolts (8mm) and the 10 mm bolt that holds the front grill trim. Also undo "poppit". Remove radiator brackets.
6. Remove bolts securing both fans 6 total i think.
7. Wiggle jiggle and curse the fans out after you pop the electrical connection loose. It helps that the radiator can be pulled back toward you a little at this point. Oh you have to pull that metal support frame out at some point too. It was easier for me to pull the right fan (facing the car) out first, then slide the left fan a little to the right to avoid the upper radiator hose.
8. Ok now we have some room to breathe. Now start disconnecting all the electrical and vacuum connections (MAKE SURE TO LABEL THEM!! I use cards and zip ties for my work)
9. Remove upper and lower TORX screws that retain the dipstick tube. Go under the car and gently pop the tube out. Make sure you dont scratch the oring..thats all that seals it.
10. Remove left half of air box, breather tube, the black plastic tube etc. Also accelerator cable from throttle body. The throttle body doesnt absolutely have to come off, but it makes life easier.
11. Under the car unhook the oil pressure sending unit and then follow the line up and disconnect whatever that is too (its big)
12. back up top disconnect the knock sensor and the power steering pump.
13 once you have all that stuff unhooked you should be able to get that main wiring harness up and out of the way. Also now is a good time to remove the tube ( Fuel vapor return) that connects right next to the IAC. All you do is push straight in on the white band with your thumbnail and at the same time pull towards you. Of course as simple as that is it took me 20 minutes to figure it out without breaking it....why would ford use all the same plastic fastening technology...that would be boring.
14. Remove the 8 bolts from the intake. The one in the middle is TOTALLY a blind shot and the one that is all the way to the left is partially obscured by the power steering pump.
Number 8's arrow doesnt exactly point to where the bolt is, but look for it right next to the power steering pump..and Oh buddy that one in the middle is fuuunnn i tell you what.
15. The bolts are NOT all the same size..so make sure you mark what goes where. If you are going to take the intake all the way out, you will have to pull the fuel rail..No big whoop. 2 10mm bolts and 4 electrical connections. Leave the fuel supply line attached. Watch out, there are little spacers behind those bolts..and you need em! Once hardware is free, just wiggle jiggle up on the fuel rail and put it somewhere that doesnt stress the supply line. When putting it back together, put some vaseline or silicone goo on the orings. Gotta lube em up to get them to slide in...once again, these orings are the only seal on this component....
16. You have to get the PCV tube unhooked somehow..its not easy. Since mine looked like this
I just reached in there with a razor knife and cut it..problem solved. You will then see this...
Clean those with a brass brush so you dont mar the metal.
17. Installation is reverse of removal with a few things...May i suggest you use "the old sticky socket"
Unless you know how to swear in several languages. Also in this repair a little telescoping magnet will save your butt!
The tape is strong enough to hold the bolt but snaps off when you get it tight..down side is if you use too much tape, the tape stays on the bolt and not on the socket..its takes some experimentation but you get the idea.
The book says this is a 2.6 hour job. It took me 7 hours over two days, but i work slow and easy.
Hope this helps someone...but once again I am SURE that i left some steps out. Take your time! Dont force anything. If if doesnt come loose right away, double check everything. There is A LOT of little electrical and vac lines criss crossing this stupid piece of plastic!


Thread
Thread Starter
Forum
Replies
Last Post
2001MilleniaSouthFL
Mazda Millenia
0
Feb 21, 2014 05:11 PM
Mazdaboy2600i
Mazda BT 50 & Pickup Trucks
1
Nov 8, 2005 05:16 PM